How To Install the Wish To Go Travel Plugin
There are two ways to install the travel plugin. If you are using WordPress, read the Install Wish To Go in WordPress section. In case you are using any other CMS or web page development platform, please read the section Install Wish To Go in a generic HTML Web Page.
Install Wish To Go in WordPress
Get the plugin
The easy way
- Open your WordPress and open your Dashboard page.
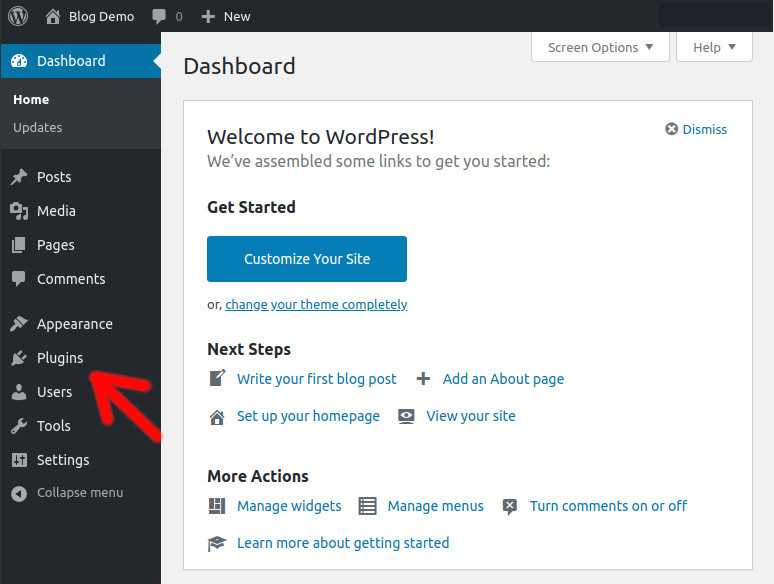
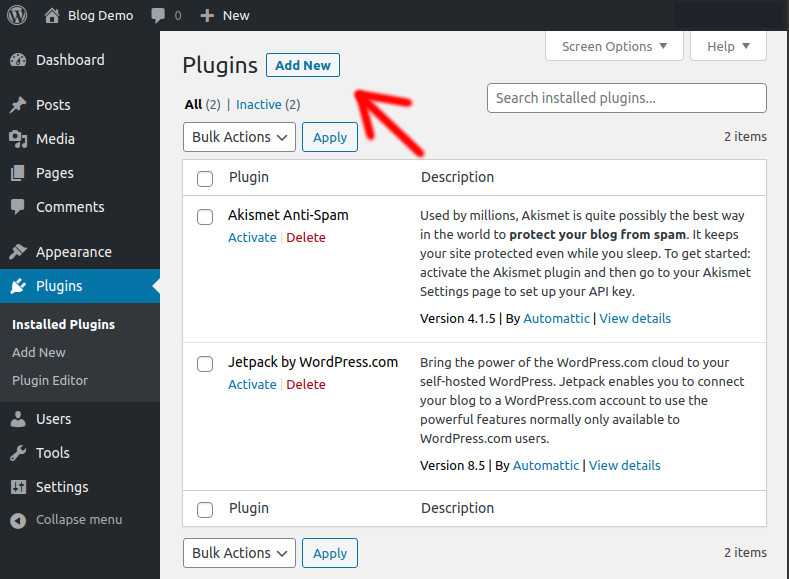
- Click on the Plugins tab and then click on the Add New at the top of the page.
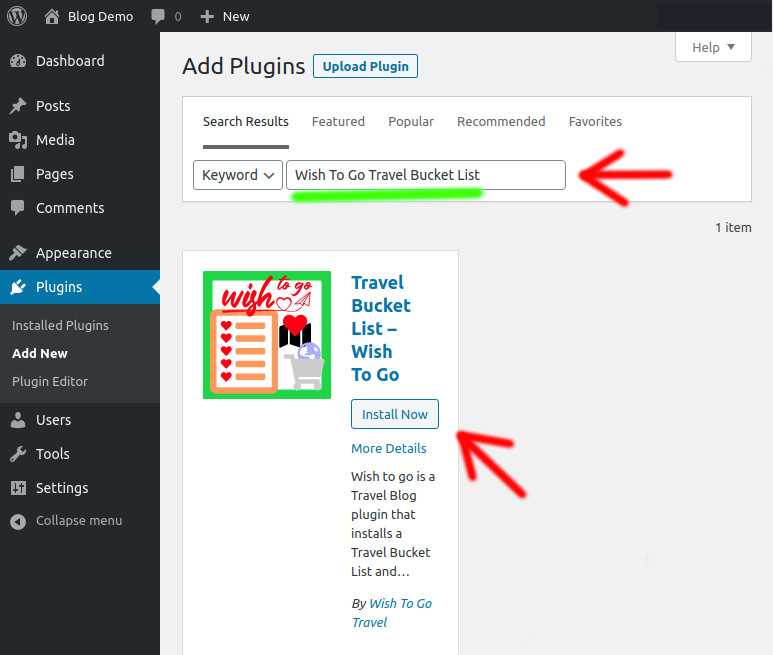
- At the plugin installation page, enter Wish To Go Travel Bucket List in the search input box. Once you've found the Wish to Go plugin, click on the Install Now button.
Once the plugin is installed, click on the Activate button which will appear at the same position where the Install Now button was.
That's it. Wish To Go Travel Plugin is already installed. Go to one of your live posts and you have to see a red heart with a 0 inside a small green circle. This confirms that you have successfully installed the plugin.
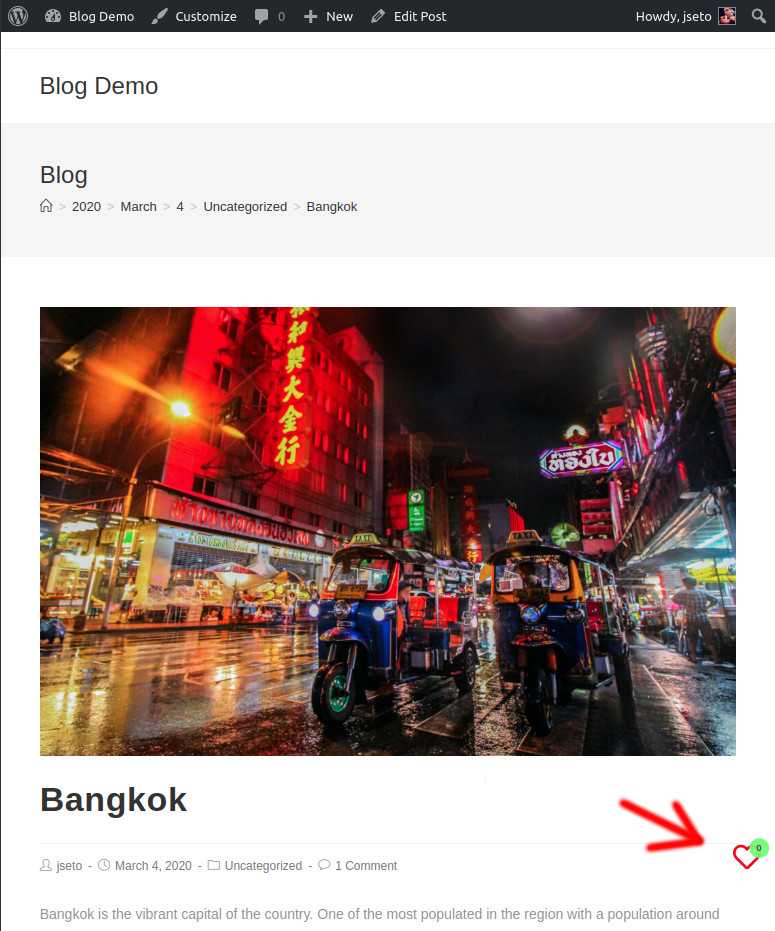
If you are not able to install the plugin, please do not hesitate to send a message to the support team.
Alternatives
If for whatever reason, you cannot find the plugin, follow these steps:
Download the plugin here.
Go to the Add Plugins page as described above.
Click on the Upload Plugin button at the top of the page and then click the Choose file button to upload the file that you just loaded in the first step.
Click on the Install Now button and then click on Activate button.
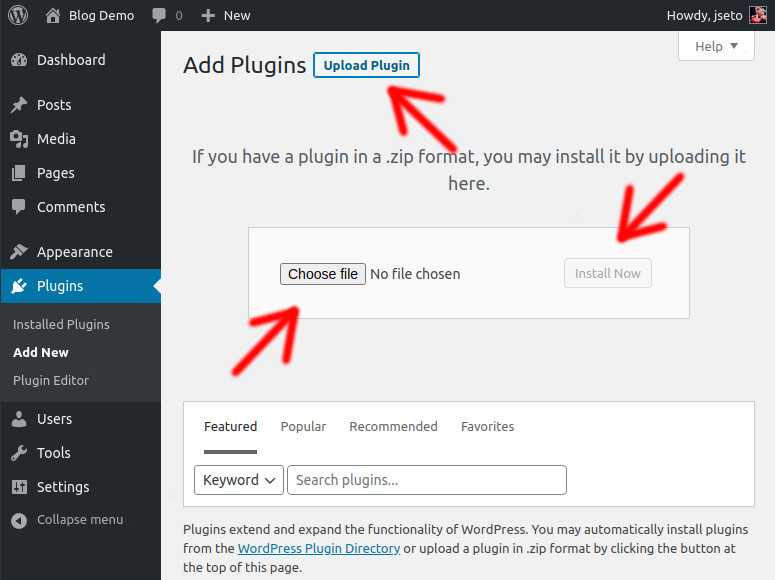
- You have installed the plugin. Go to the step 5 in the previous section to know how to check if the plugin has been properly installed.
Install Wish To Go in a generic HTML Web Page
1. Load the JavaScript Code
The JavaScript code is loaded by inserting this
<script src="https://cdn.wish-to-go.com/wish-to-go.main.js"></script>tag at the bottom of your HTML document but still inside the <body> tag.
A very minimalistic webpage loading a WishWidget and the needed script is shown below:
<html>
<body>
	<h1>My Entry Title</h1>
	<p>
		This is the entry body with a Wish To Go Heart.
		<WishWidget country="TH"></WishWidget>
	</p>
	<script src="https://cdn.wish-to-go.com/wish-to-go.main.js"></script>
</body>
</html>
The highlighted line is the one loading the JavaScript code. Note that it is inserted just before the </body> closing tag.
2. Check your Installation
To check that the script is loaded and the plugin is properly initialized, just add this tag in any part of your HTML page:
<WishCounterWidget></WishCounterWidget>You have to see a red heart with a 0 inside a small green circle in the bottom-left corner of your browser. This confirms that you have successfully installed the plugin.

Troubleshooting
In some cases, the initialization of the script can fail because it is called before the page is rendered. This will likely happen when server side rendering is used.
The Wish to go JavaScript code exposes a global function in the window namespace called wtgInit. If the WishCounterWidget is not rendered properly, you can call the wtgInit function somewhere in your webpage where you know the document has been rendered.
If you are not able to have the plugin working, please do not hesitate to send a message to the support team.